What to do first after buying a UGREEN NAS (DXP6800 Pro)
Contents
This article lists 12 things to do after buying the UGREEN NAS "DXP6800 Pro" (its OS is UGOS) and before you start using it. I first explain what a NAS is. The first half of the 12 items covers installing the drives, connecting to the LAN, and the initial setup of UGOS. The second half goes as far as logging in from a Mac with ssh and making Codex CLI usable inside the NAS. After that, I write about how to divide use between the NAS and Dropbox or Google Drive, how to build a knowledge DB inside the NAS, and how to share knowledge when working as a team. Detailed operations can be left to the official guides or to AI agents, so here I write what to do and why. The environment I checked was a DXP6800 Pro, six 12TB HDDs, and a Mac (November 2026).
What a NAS is
A NAS (Network Attached Storage) is a place for files that you use over a network. An external HDD connects to one computer by USB, but a NAS connects to your home router with a LAN cable. Any Mac or smartphone on the same LAN can open the same files on the NAS.
Inside, a NAS is a small Linux computer. It has a CPU and memory, and runs an OS. The OS of the DXP6800 Pro is called UGOS, and it is based on Debian 12. So besides storing files, you can log in from the Mac terminal to run commands, and install the CLIs of AI agents.
Checked in the author's environment on November 16, 2026
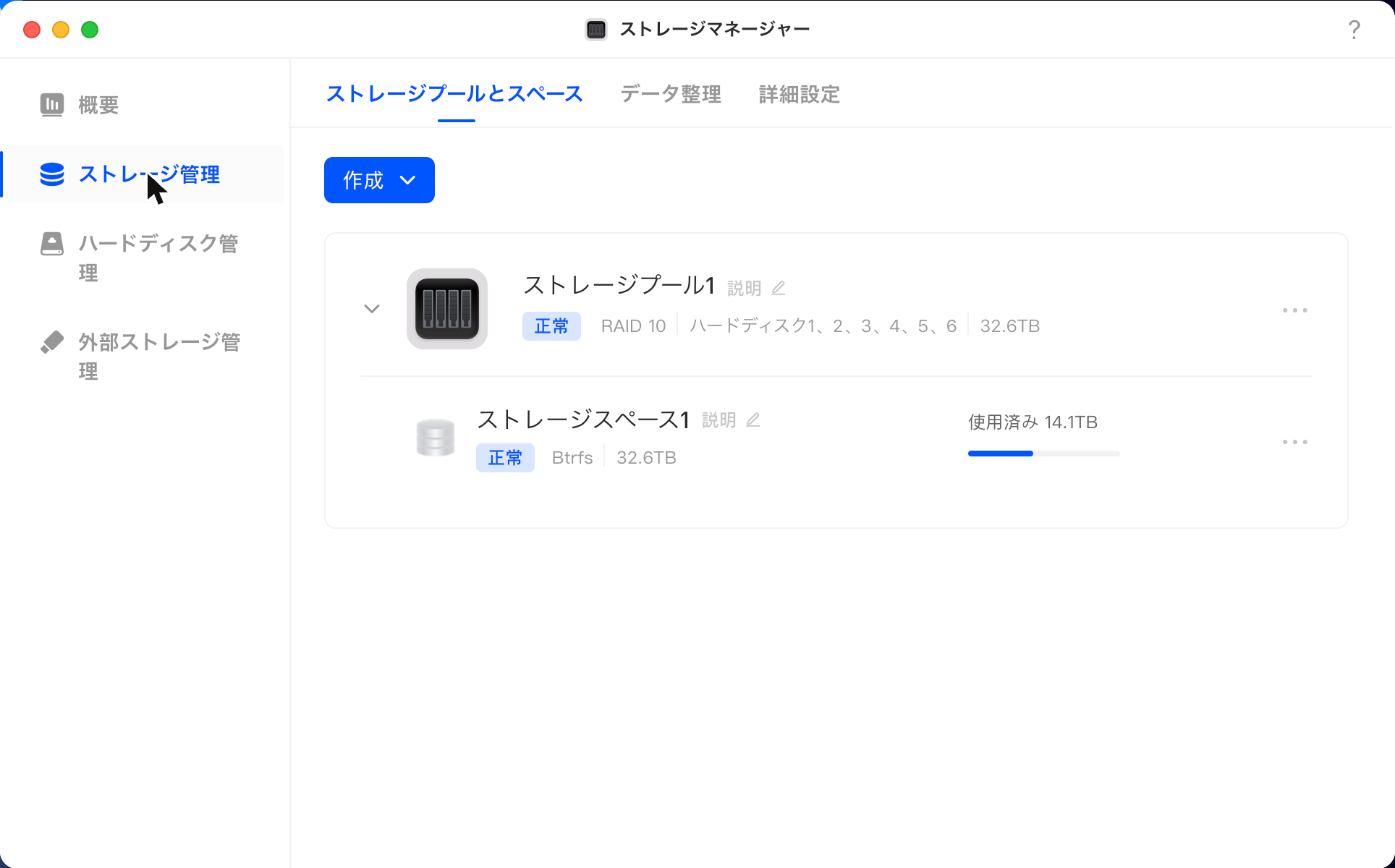
In the setup in this article, the DXP6800 Pro holds six 12TB HDDs combined into RAID 10. RAID 10 splits the six drives into three pairs and writes the same data to both drives in a pair. If one HDD fails, the data remains on the other drive in the same pair. Because the same data is written to two drives, the usable capacity is that of three drives (12TB × 3), not six. The UGOS screen shows 32.6TB. This is because the 12TB of an HDD is counted in units of 1000, while the screen counts in units of 1024.
CapacityOf six 12TB HDDs, the capacity of three can be used. The UGOS screen shows 32.6TB
Checked in the author's environment on November 16, 2026
If both drives in the same pair fail, the data in that pair is lost. How to choose the RAID type is covered in item 6.
When a Mac or smartphone is on the same LAN as the NAS, it reaches the NAS directly. When you use it from outside the home, you enter the NAS through Tailscale (item 12). The terms used in this article are as follows.
| Term | Meaning and how it is used in this article |
|---|---|
| NAS | A place for files that you use over a networkShort for Network Attached Storage. In this article, the DXP6800 Pro |
| RAID 10 | A method that writes the same data to each pair of drives and combines several pairs into oneSix 12TB HDDs in three pairs, using the capacity of three drives |
| UGOS | The OS that runs on UGREEN NAS devicesBased on Debian 12. Settings are made in a management screen in the browser |
| SMB | A protocol for sharing filesUsed to open NAS folders from the Mac Finder |
| SSH | A protocol for logging in to a remote computer from a terminal and operating itUsed to log in to the NAS from a Mac (items 8 and 9) |
| Tailscale | A VPN service that connects devices in different placesUsed to log in to the NAS from outside the home (item 12) |
After opening the box
1. Install the drives
The DXP6800 Pro holds six 3.5-inch drives. Each drive is placed on a tray at the front and slid in. According to the official guide, 3.5-inch drives are held in place by the clips on the tray, and the screws and screwdriver are for installing 2.5-inch drives and M.2 SSDs1. Insert and remove drives with the power off.
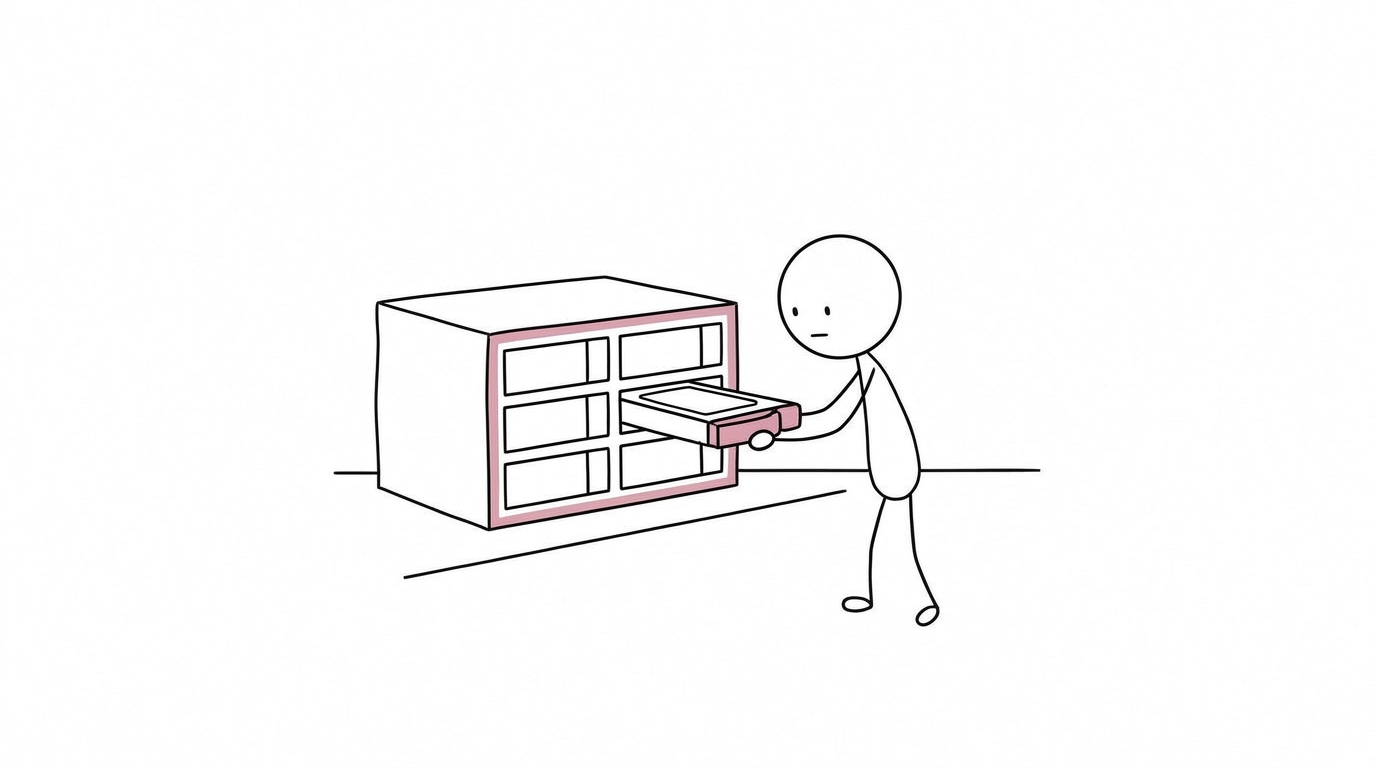
Before buying drives, check their model numbers in the UGREEN compatibility list2. In this environment, I installed six NAS HDDs (12TB). Decide the number and capacity of drives together with the choice of RAID in item 6.
2. Connect to the router with a LAN cable
The NAS cannot connect over Wi-Fi, so connect it with a LAN cable to the router (or to a switch connected to the router)1. Put the Mac or smartphone you use for setup on the LAN of the same router. If they are not on the same LAN, the NAS will not be found in item 4.
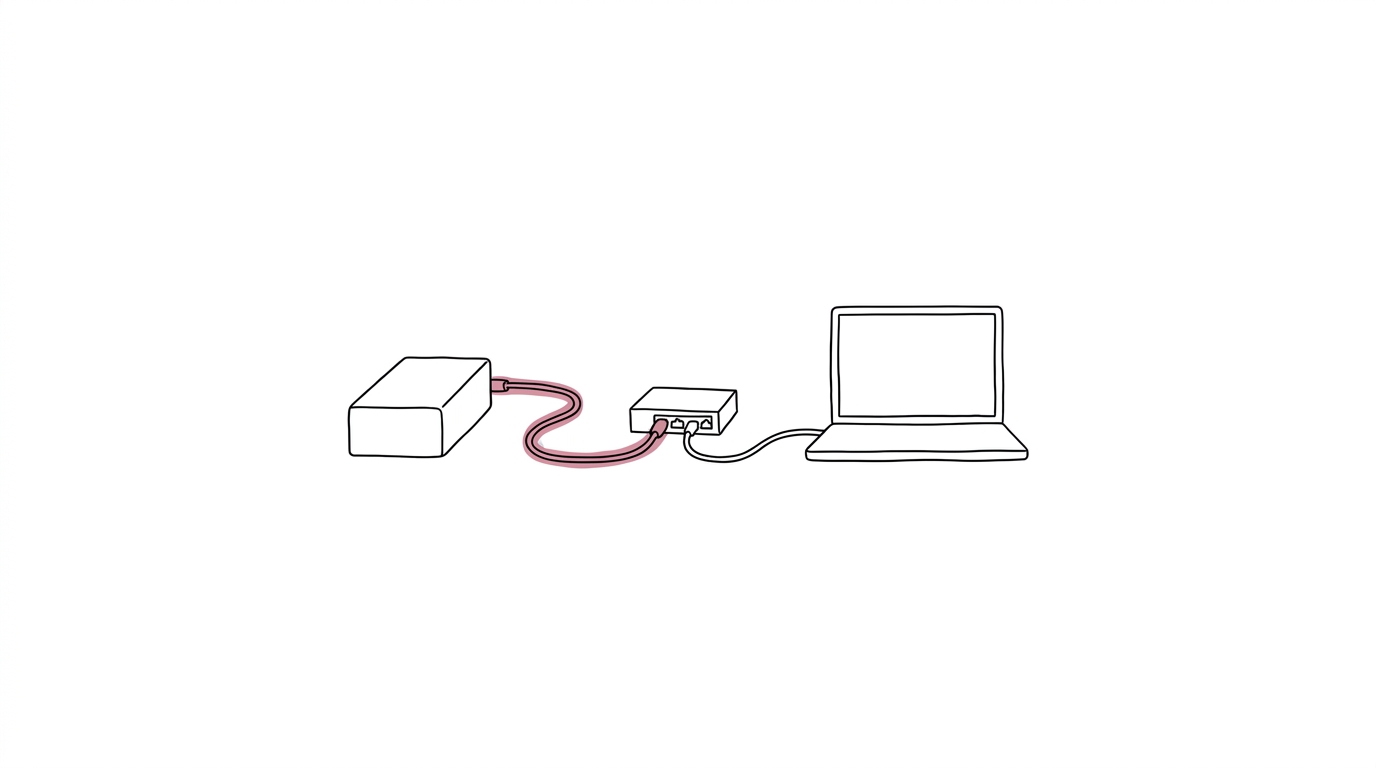
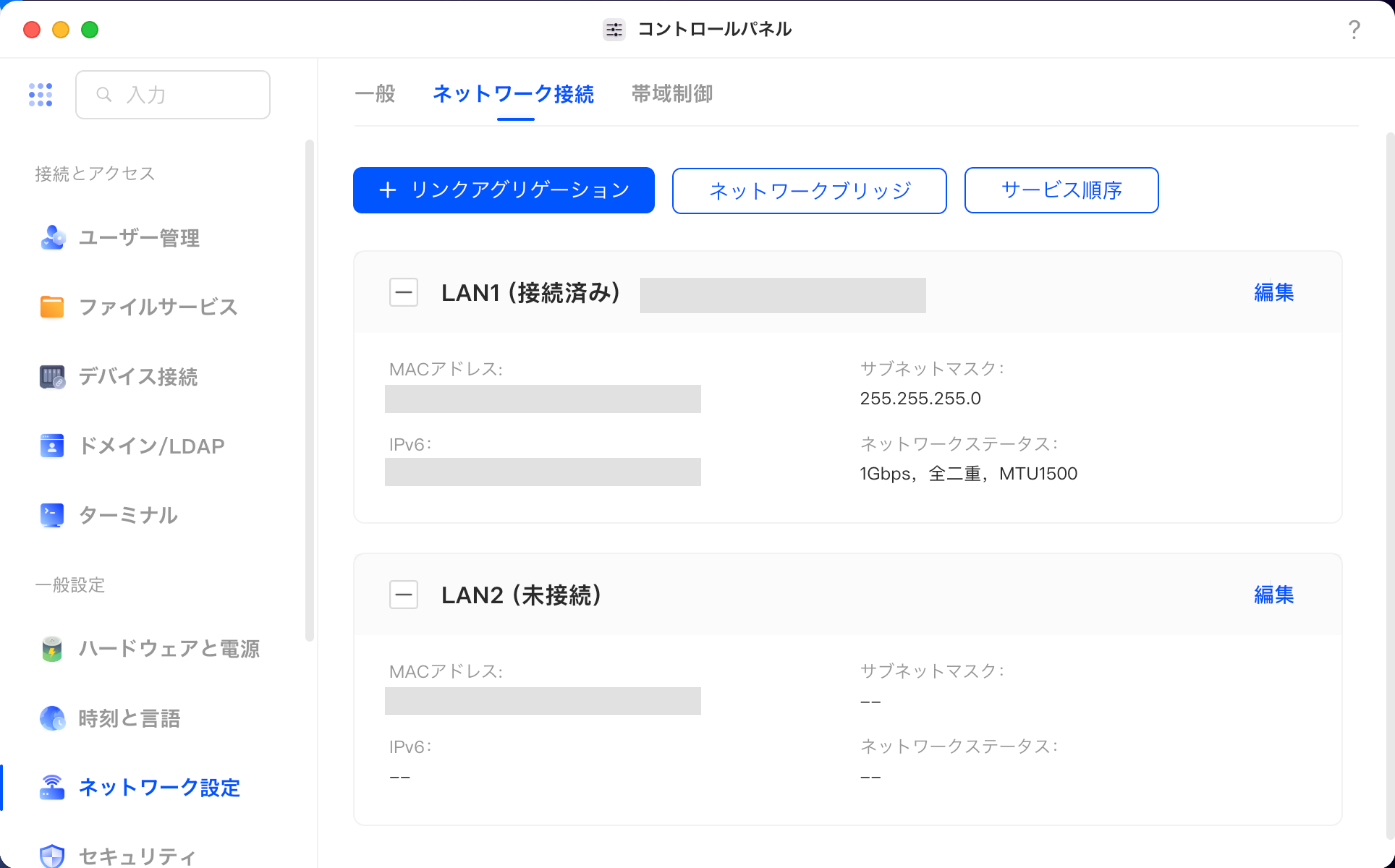
The back of the DXP6800 Pro has two LAN ports, both supporting 10GbE3. Connecting one is enough. You get 10GbE speeds only when the router or switch and the cable also support 10GbE. In this environment the other end is 1GbE, so I use one port at 1Gbps.
3. Turn on the power
Connect the supplied power adapter to the back and press the power button. When the front light turns solid white, startup has begun1.
Initial setup of UGOS
4. Find the NAS
On a computer, open find.ugnas.com in a browser on the same LAN as the NAS, and the NAS on the LAN will be shown. On a smartphone, the UGREEN NAS app searches for a NAS on the same LAN1. A NAS that has not been set up yet is shown as "Not Initialized".
5. Initialize it and create an administrator account
Selecting the NAS you found takes you to the initialization screen. Choose a name for the NAS and create an administrator account inside the NAS (a local account). Note down this user name and password, because you will also use them later to log in with SSH.
Registering and linking a UGREEN account is optional. Register one if you use features such as UGREENlink or quick login, and skip it if you do not need them1.
6. Decide the storage pool and RAID
Drives become usable only after you combine them into a storage pool and create a volume on it. You choose the RAID type when you create the pool. The RAID type determines the usable capacity and how many drive failures it can withstand. Drives added to a pool are initialized, and the data on them is erased4.
The types available in UGOS and their minimum numbers of drives are: Basic and JBOD, 1; RAID 0 and RAID 1, 2; RAID 5, 3; RAID 6 and RAID 10, 45. A rough guide to choosing by number of drives is as follows.
- 1 drive: Basic. If the drive fails, the data is lost.
- 2 drives: RAID 1. The same content is written to both, so the usable capacity is one drive.
- 3 drives: RAID 5. It withstands one drive failure, and the usable capacity is two drives.
- 4 or more drives: choose from RAID 5 (withstands one drive failure; capacity is the number of drives minus one), RAID 6 (withstands two drive failures; capacity is the number of drives minus two), and RAID 10 (built with an even number of drives; capacity is half).
In this environment, I put six 12TB HDDs into RAID 10. The usable capacity is three drives, and the UGOS screen shows 32.6TB. The volume file system can be Btrfs or ext46, and I chose Btrfs. RAID protects against drive failure; it cannot bring back files deleted by mistake. Keep a backup of important data in a place separate from the NAS as well.
7. Update the system
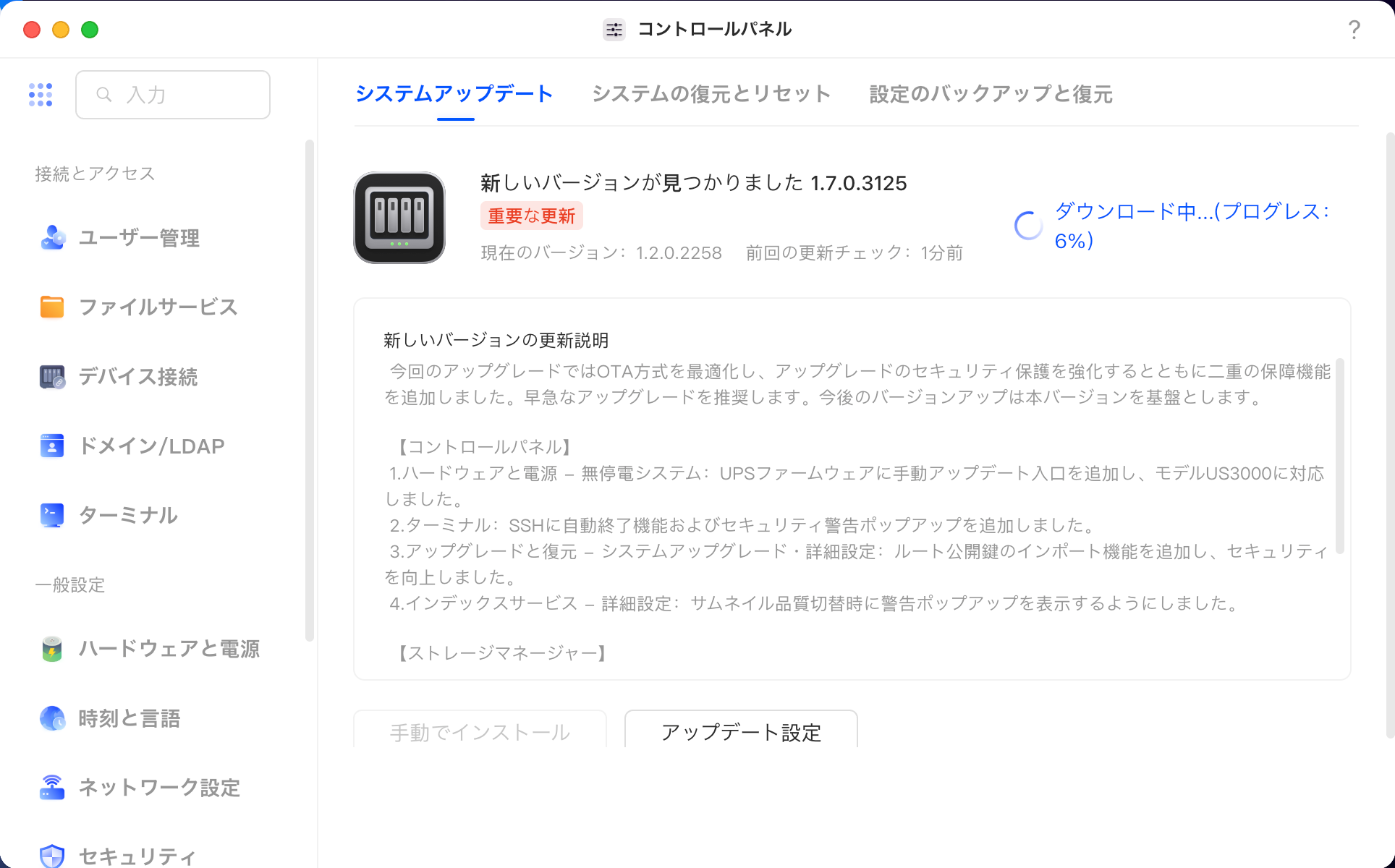
Before you start using it, update UGOS to the latest version. It is under System Update in Update & Restore in the Control Panel7. The update may restart the NAS, so do it before putting data in.
Making it usable from the Mac terminal
The detailed commands from here on can be done by asking an AI agent on the Mac (such as Codex CLI or Claude Code). When you ask, tell it the model and OS (DXP6800 Pro, UGOS, based on Debian 12, x86_64), that you can log in with ssh nas, that npm and git are not installed, and that it should place files in ~/.local/bin without changing system packages.
8. Enable SSH and connect by the .local name
SSH cannot be used until you enable it in the UGOS settings. Even when the management screen opens in the browser, SSH port 22 may be closed. The setting is under SSH in Terminal in the Control Panel8.
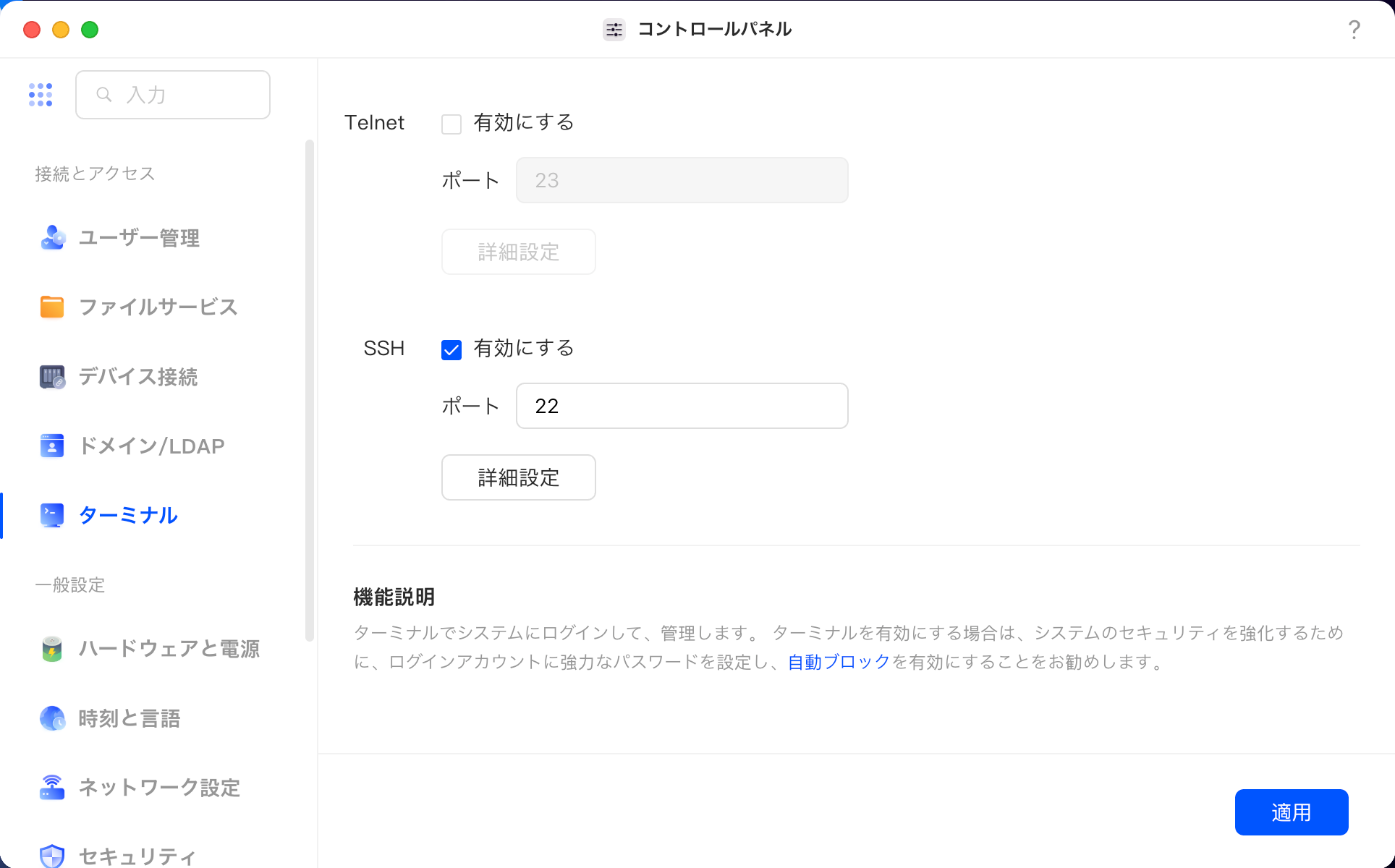
For the connection target, write the name <NAS name>.local instead of an IP address. On the DXP6800 Pro, the name was the model name followed by four alphanumeric characters. The IP address is assigned by DHCP, and it has changed while I was using it.
9. Register a key from the Mac and log in with ssh nas
Create a key on the Mac just for the NAS, and register the public key on the NAS. If you write a connection target called nas in ~/.ssh/config on the Mac, you can log in with just ssh nas without typing a password.
If you are refused with Permission denied even after registering the key, check the permissions of your home directory on the NAS. The NAS sshd runs with StrictModes yes, and if other users can write to the home directory (777), it does not accept key login. Changing it to 755 makes it work. After I updated the UGOS system, the permissions of the home directory and ~/.local went back to 777, and key login stopped working. If you cannot log in with the key after an update, log in with the password and set the permissions back to 755.
10. Install Codex CLI in ~/.local/bin and log in
The NAS OS is Debian 12 (x86_64). node is installed, but npm and git are not. So I placed the standalone Linux binary (codex-x86_64-unknown-linux-musl.tar.gz) from the openai/codex releases on GitHub in ~/.local/bin, and added it to PATH in ~/.profile. The permissions of ~/.local and ~/.local/bin were 777, so I changed them to 755.
The NAS has no screen or browser, so use the following command to log in. Open the displayed URL in a browser on your own device and enter the code.
codex login --device-authIf codex login status shows Logged in using ChatGPT, you are logged in. The version when I checked was codex-cli 0.169.0. Claude Code also installed into the same ~/.local/bin with the official installer (I have not tried logging in yet).
Besides Codex CLI, it is also worth installing Google's Antigravity CLI (the command name is agy). The official installer10 supports Linux (x86_64) and places agy in the same ~/.local/bin as Codex CLI.
curl -fsSL https://antigravity.google/cli/install.sh | bashStarting agy without arguments shows sign-in instructions. Log in to your Google account in a browser and paste the displayed authorization code into the agy screen. If agy models shows a list of available models, you are signed in. The list includes Claude and GPT-OSS models as well as Gemini, but I recommend the recent Gemini 4 Hydrogen. To get a single answer, use it as follows.
agy -p "Question" --model gemini-4-hydrogen-highI checked sign-in and operation on a Mac (agy 1.5.9).
11. On a network that goes through a proxy, check the proxy values
This item applies only when you place the NAS on a network, such as at a workplace, that reaches the internet through a proxy. On a home network without a proxy, you do not need to do anything.
At every login, UGOS set the environment variables http_proxy and https_proxy to a value without a leading http://, such as proxy.example:8080. CLIs did not accept this value as a URL, and the Claude Code installer stopped with Invalid proxy URL in https_proxy. Because UGOS may write back the files in /etc, I added http:// in my own ~/.profile instead.
12. To log in from outside the home, use Tailscale
The settings so far apply when the Mac and the NAS are on the same LAN. If you want to log in to the NAS from outside the home, one way is to use Tailscale. With the NAS and the Mac in the same tailnet, I could log in with SSH by specifying the NAS's Tailscale address, even when the LAN could not reach it. The UGREEN Knowledge Center has steps for installing Tailscale with Docker9.
In ~/.ssh/config, list the LAN connection target and a connection target with the Tailscale address side by side under different names. The LAN and Tailscale are separate routes, and even if the NAS appears in the Tailscale list, the LAN name does not always reach the NAS. Whichever way you log in, you can use codex in the same way inside the NAS.
When you do not have a Mac at hand, you can also use a Telegram bot as the entry point. When you create a bot with Telegram's BotFather, a bot token is issued. On a Linux machine at home, I keep a small script running that uses the token, passes received messages to an AI agent, and has the replies sent back to Telegram. It accepts only my own chat. If the same bot token is used on two machines at once, receiving messages conflicts and stops, so use a separate bot for each machine.
Dividing use between the NAS and Dropbox or Google Drive
A NAS can be used as a place for files instead of Dropbox or Google Drive. But they are good at different things, so dividing use between them is easier to handle than moving everything.
| Item | NAS (the setup in this article) | Dropbox and Google Drive |
|---|---|---|
| Capacity and cost | Up to the HDD capacity. About 19TB free in this setup. No monthly fee | Up to the capacity of your plan. A fee based on capacity |
| Using it from outside the home | Accessible once Tailscale is installed (item 12) | Usable anywhere with an internet connection |
| Opening on your Mac | Connect and open via SMB from the Finder. Cannot be opened when the NAS is unreachable | Synced to the Mac, so files open even offline |
| Sharing with others | Used with people who have a NAS account | You can send a link to show files or edit them together |
| Letting AI agents read files | Codex CLI and others running inside the NAS can read them directly | Readable if the files are synced to the Mac |
| On failure or deletion | With RAID 10, one HDD failure does not lose data. A separate copy is needed for deleted files and for fire or theft | Data is on the provider's servers. Deleted files can be restored for a certain period |
Checked in the author's environment on November 16, 2026
I put large files that I do not share with others (recordings, original photo data, and so on) on the NAS, and keep files I exchange with others and files I often open on my smartphone in the cloud. I also regularly copy important NAS folders to the cloud or to an external disk.
The NAS is also connected to the home network, and with Tailscale it can be reached from outside the home. For data that must be kept in a place not connected to the internet, such as research data, check first whether it may be placed on the NAS.
Building a knowledge DB inside the NAS
Once Codex CLI and Antigravity CLI run inside the NAS, building a knowledge DB there lets agents search your materials. A knowledge DB here is not database software but a folder of Markdown files arranged in a fixed format. For the volume of one person's materials, agents can find what they need with grep and by reading files, so it works without setting up a vector DB.
~/kb/
  AGENTS.md    Rules for agents (the CLI reads this first)
  INDEX.md     An index with one line per file
  raw/         Original materials collected. Do not rewrite
  notes/       Markdown summaries of raw/. One file per topic
Put the rules in a single AGENTS.md. Codex CLI reads AGENTS.md before working11. Antigravity CLI also reads an AGENTS.md placed in the folder as rules12. Claude Code reads AGENTS.md when there is no CLAUDE.md13. If you do not create a separate CLAUDE.md, the three CLIs work by the same rules. In AGENTS.md, write briefly: read INDEX.md first; do not rewrite raw/; if a file on the same topic exists, edit it instead of creating a new one; and when adding a file, add one line to INDEX.md.
In INDEX.md, write a link and a one-line description for each file in notes/. Agents read the index and then open only the files they need, so they do not have to read every file. The /llms.txt proposal14, which places guidance for LLMs on a website in Markdown, is based on the same idea.
At the top of each file in notes/, write fields (frontmatter) like the following. Make description one sentence that can be copied into the index as is, and list in sources the raw/ files it is based on. With sources, you can later go back to the original materials to check.
---
name: ugos-proxy
description: UGOS proxy values lack http://, stopping CLI installers, and how to fix it
updated: 2026-11-16
sources: [raw/terminal-log-20261116.txt]
---
To build it, ask an agent started inside the NAS, for example, as follows.
Build a knowledge DB in ~/kb. Set up AGENTS.md, INDEX.md, raw/, and notes/, read the materials in raw/, and summarize them in notes/ with one file per topic. Write name, description, updated, and sources at the top of each file, and add one line for each to INDEX.md.RAID 10 protects data when an HDD fails, but it cannot bring back files that were deleted or overwritten. Before having agents write files, copy ~/kb to another place as well.
Sharing knowledge when working as a team
When working with a team or with research collaborators, it helps to share knowledge before sharing the files themselves. This applies whether or not you use a NAS. Knowledge here means four things: the work log for each project (WORKLOG.md), the index of projects (INDEX.md), the rules (AGENTS.md), and the knowledge DB from the previous section (notes/). If these four are in a shared folder, another person or an AI agent can resume the work without reading the conversation history so far.
shared/
  AGENTS.md        Rules (read first)
  INDEX.md         Index of projects. One line per project
  projects/
    Project A/
      WORKLOG.md   Work log for Project A
      (manuscripts, data, figures, etc.)
    Project B/
      WORKLOG.md   Work log for Project B
  kb/
    INDEX.md       Index of the knowledge DB
    notes/         Markdown, one file per topic
Folder and file names are examples
Place one WORKLOG.md directly in each project folder. It is not a work diary or a summary of conversations; write only information that would take effort to look up again later. The items and their order are as follows.
Do not write copies of file contents, a chronology of steps tried, or explanations of general background. Do not write credentials such as passwords and tokens, or actual values of personal data, either. For work that needs them, write only where they are stored. This is because everyone the folder is shared with can read the files in it.
The format of WORKLOG.md can be, for example, as follows. Omit sections that do not apply.
# Project name work log

Write the requester, purpose, and deadline in one paragraph

## Status (YYYY-MM-DD)
Status: in progress / paused / completed. One-sentence summary
Condition for resuming: (condition). First step: (what to check, or a command)

### Latest deliverables
- Relative path (status)

### Key decisions and confirmed items
- Decisions and reasons, facts checked

## Open issues
1. Item, who answers, what to check

## External communication
- YYYY-MM-DD sent / received: gist
In INDEX.md, write one line for each ongoing project: the project name, the folder location, the current status, and what to do next. If a line for the same project already exists, edit that line instead of adding a new one. Write the details only in WORKLOG.md, and do not copy them into INDEX.md. If the same content is in two places, one of them becomes outdated.
- Write WORKLOG.mdAt a break in the work, update the current status and the first step
- Edit the one line in INDEX.mdWrite the project status and what to do next
- The next person reads INDEX.mdThey learn where the project folder is
- Read WORKLOG.md and resumeStart from the first step
Who writesSteps 1 and 2 are done by the person stopping the work; steps 3 and 4 by the next person or AI agent to work on it
The steps are the same when handing over to an AI agent. If you write in AGENTS.md "First read INDEX.md, then read the WORKLOG.md of that project" and "Update WORKLOG.md and INDEX.md at each break in the work", you can instruct agents to read and write in this order.
Choose where to put it according to the people you share with. If they have a Google account or a Dropbox account, a shared folder on Google Drive or Dropbox is enough. You can also put it on the NAS. Compared from the point of view of sharing, they are as follows.
Wherever you keep them, WORKLOG.md, INDEX.md, and AGENTS.md are Markdown files, so they can be used in the same way. When you change the place, move the whole folder.
References
- UGREEN. A Beginner's Guide for the UGREEN NASync Series. (Accessed November 16, 2026) https://ai.ugreen.com/pages/nasync-series-beginner-guide
- UGREEN. Compatibility List. (Accessed November 16, 2026) https://ai.ugreen.com/pages/compatibility
- UGREEN. NASync DXP6800 Pro (specifications on the product page). (Accessed November 16, 2026) https://ai.ugreen.com/products/ugreen-nasync-dxp6800-pro-nas-storage
- UGREEN NAS Knowledge Center. Creating storage pools and volumes. (Accessed November 16, 2026) https://support.ugnas.com/detail/article/en-US/493
- UGREEN NAS Knowledge Center. Storage modes and minimum numbers of drives. (Accessed November 16, 2026) https://support.ugnas.com/detail/article/en-US/498
- UGREEN NAS Knowledge Center. Volume file systems. (Accessed November 16, 2026) https://support.ugnas.com/detail/article/en-US/662
- UGREEN NAS Knowledge Center. System update (Japanese). (Accessed November 16, 2026) https://support.ugnas.com/detail/article/ja-JP/383
- UGREEN NAS Knowledge Center. SSH settings (Japanese). (Accessed November 16, 2026) https://support.ugnas.com/detail/article/ja-JP/481
- UGREEN NAS Knowledge Center. Installing Tailscale (Japanese). (Accessed November 16, 2026) https://support.ugnas.com/detail/article/ja-JP/622
- Google Antigravity Docs. Get started (CLI tab). (Accessed November 16, 2026) https://antigravity.google/docs/getting-started?tab=cli
- OpenAI. Custom instructions with AGENTS.md. (Accessed November 16, 2026) https://developers.openai.com/codex/guides/agents-md
- Google Antigravity Docs. Rules. (Accessed November 16, 2026) https://antigravity.google/docs/rules
- Claude Code Docs. How Claude remembers your project. (Accessed November 16, 2026) https://code.claude.com/docs/en/memory
- llms-txt. The /llms.txt file, v2. (Accessed November 16, 2026) https://llmstxt.org/